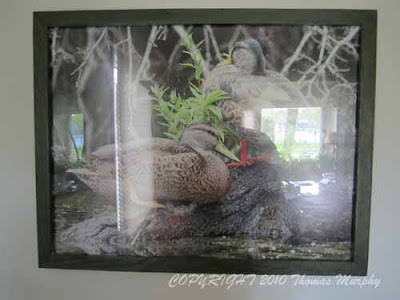
Above is stained green with water based
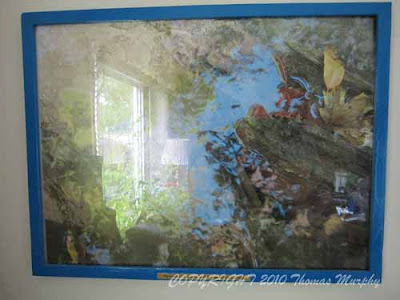
Above is painted
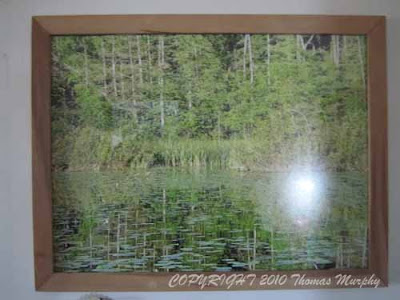
Above is curb wood with symmetrical dowel inserts, my picture reminds of the Monet painting Water Lilly's
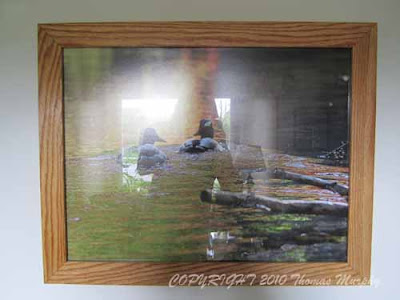
Above is Oak curb wood.
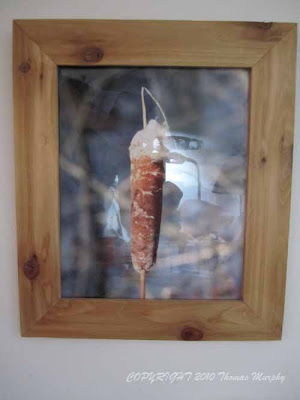
Above is Cedar with Cattail Photo
How to Make a Picture Frame 05 13 2010
1. Determine how big the picture you are going to put in it is by measuring it with a tape measure.
2. Determine what you have to make it from, most likely wood
3. The internal dimensions of your rectangle or square window part of the frame should be about 1/8” to 3/16” less than the respective dimension of the picture
4. It is the inside measurement of the frame that is important.
5. A miter saw with a fine tooth blade is necessary
6. Mark the ends of the frame to your dimensions with a framing square as they are set to 45 degrees. Mark with a pencil and put masking tape over this end and remark again with a sharp pencil.
7. You want to cut both pieces of wood that are opposite by clamping them together and putting them fixing them in your miter saw with a clamp. Set the Miter saw to 45 degrees.
8. So both pieces of wood to cut at the same time are clamped together in places where they will not interfere with their position in the miter saw. Then they are clamped in the miter saw. Hook up your dust collectors, put on safety gear and make cuts.
9. You will need to form a channel where the glass will fit. This is usually done with a router; however it can be done with two right angle cuts on a table saw. A chisel can be helpful as well as a hand plane.
11. There are many way to join the corners together and you can be artistic when you do this. The best method is to use a biscuit cutter and cut a slot in the angled corner. To cut in the appropriate place you must first align your frame together loosely to see how it fits together. Corner clamps will allow you to see how it will fit, whether it will be square and snug or you need a little wood filler. Mark a place where the biscuit will go the same place from one side to the next at the corner. And dissemble and cut your slot to the appropriate biscuit size you will use. The width of the wood on some frames is too narrow to allow you to use even the smallest biscuits so in this case you have to do it a different way. The biscuit cutter can still be used but from a top down method whereby you are only using half a biscuit
12. Another method for joining corners is to drill countersunk holes with your drill press and use pocket hole square drive screws to join the corners.
13. I like to glue and clamp my corners.
14. If using glue have a bucket of water and a microfiber towel handy to wipe off any residual glue on the non contact surfaces, because if you do not it will seal the pores where it resides and when you go to stain it, the stain will not sink in right there where the glue is and it won’t look as good.
15. When gluing and clamping the corners together make sure that the frame is square by using a framing square. It is okay to take different clamps and use various alignment methods with your end goal being a tight joint at the corners and square alignment of sides.
Stain, Clear coat and, or paint at this time before you put the glass in.
Glass
1. Now measure the gap where the glass will fit and order some glass. Lowes home improvement store will custom cut it for you. You should pick the smallest piece for sale that they can cut so you are not wasting money or glass. Have them cut the glass maybe 1/8” less per one side in each of the two directions left-right and up-down, so that you do not have to cut the channel in the frame bigger after the glass is cut and it doesn’t fit. I like to take some low voc clear caulk, Big Stretch caulk and lay a bead of clear caulk in the channel and then place the glass on this. It is okay to clamp the frame to a piece of particle board to keep it on a level plane. Both now and after it has dried.
Mounting Picture to Poster board:
Take some contact adhesive and a piece of foam board from Wal-Mart or another store and spray it with the adhesive. Then carefully place your photograph over this. Do not put photograph on the poster board until a few days after the ink of the pictures has dried and cured. Because you will need to take a soft new rag of the type that won’t scratch off the ink and rub the bubbles out of the picture.
Keep the picture in a separate room when you spray so that you don’t spray your picture.
Putting picture in frame:
I like to use a staple gun, to mount the picture in the glass frame but I have some experience. The other way is to use glazing pins you can buy cheaply at the hardware store. But if working with hardwood it is sometimes hard to push them in enough, do it with just the right amount of pressure so you don’t break the glass and also they do not hold the picture in well.
Picture Hanging Hardware:
My favorite method for hanging larger pictures is to take a small triangle of thin sheet metal that I have cut with a Weiss snips and drill three holes in it that correspond to the size of the head of the small screws that you have bought at your local hardware store or McFeely’s website or catalog. The thin piece needs to be bent twice so that it fits on the frame and bends in towards the glass or backing when affixed to the wood by the two screws per side. You will need to use one of your smallest size drill bits and mark and drill PARTIAL deep holes where you are to affix your screws that are a lot smaller that the thickness of the frame to the frame. A balance must be struck here between not going through the wood with the screw and having the screw have strong enough holding power.
Once these self made brackets are affixed it is time to put the wire on the back of the frame. I like to use a scrap piece of strip copper house wiring because it is malleable to partially dent a form around the screw or screw you will be hanging this from, for stability. This wire goes through the third hole you made on each side of your sheet metal bracket. This hole has been designed and positioned over the inside edge of the backside of the frame to be inset. Wrap the wire end around the centering piece of it four or five times longer orientated winding wraps, to about 4 to 5 inches in from the side and you should be good.
You need to measure where it will hang on your wall in terms of height so that if you put up more than one picture on a wall they will be level. Or it will be level with something else that you want it to be level with. If it is not level you can move the screw, I like to go into the stud with a pocket hole screw because they have a nice head for hanging pictures. Or the other method to changing the height on the wall is to loosen your winding on the back of the frame and either mark off a spot on the wire with more or less wire so that the picture will either be lower or higher respectively. For smaller picture frames use a drill bit with a stop collar, mark the center of the top at the back of the frame and drill a few holes, then use a sharp would chisel to carefully carve a better slot. The slot should have a slight angle upwards.
Conclusion:
Above are some of the frames I made from Curb Wood. As you can see when I did not have enough wood on the Green frame I spliced and angle piece in to make up the length and biscuit joined it. Sometimes curb wood has flaws, in this case you can drill a hole with your drill press and place a dowel in it, and another somewhere else on the same piece to make it look symmetrical and purposeful and it is purposeful. Different types of wood can be used to make a frame, with lesser qualities finishes are usually paint, darker stains or some neat artistic effect you can think of to be original. I hoped that I have familiarized you with this little known art form and that you do indeed get started to making nice picture frames yourself. Take pride in your Curb Wood Art, and the flaw you might have is the jealousy of others who can’t do the same. Recycling wood and designing something unique is a most rewarding experience.
Blessed are those who think.
Thomas Murphy
Copyright 2010 Thomas Paul Murphy
Thanks for sharing this great content, I really enjoyed the insign you bring to the topic, awesome stuff!
ReplyDeleteGold & silver chain by the inch
Thank you so much for a well written, easy to understand article on this. It can get really confusing when trying to explain it – but you did a great job. Thank you!
ReplyDelete<a href="http://www.smsideatechnosolutions.com/odisha/cuttack/bulk-sms.html>Bulk SMS Service Provider In Cuttack</a>